Managing attendance is a crucial part of workplace organization, and Google Sheets makes it easy to keep track of workdays using simple formulas. In this post, we’ll guide you through the process of creating an Attendance Sheet with Checkboxes in Google Sheets, along with a formula to automatically count the workdays.
Why Use Attendance Sheet with Checkboxes in Google Sheets?
Checkboxes provide a visual and interactive way to mark attendance. When combined with a formula like COUNTIF, you can effortlessly calculate total attendance for each employee based on the days they’ve worked. It’s a quick and efficient way to manage attendance without manually counting each checkbox.
Let’s walk through a real-world example using employee attendance data.
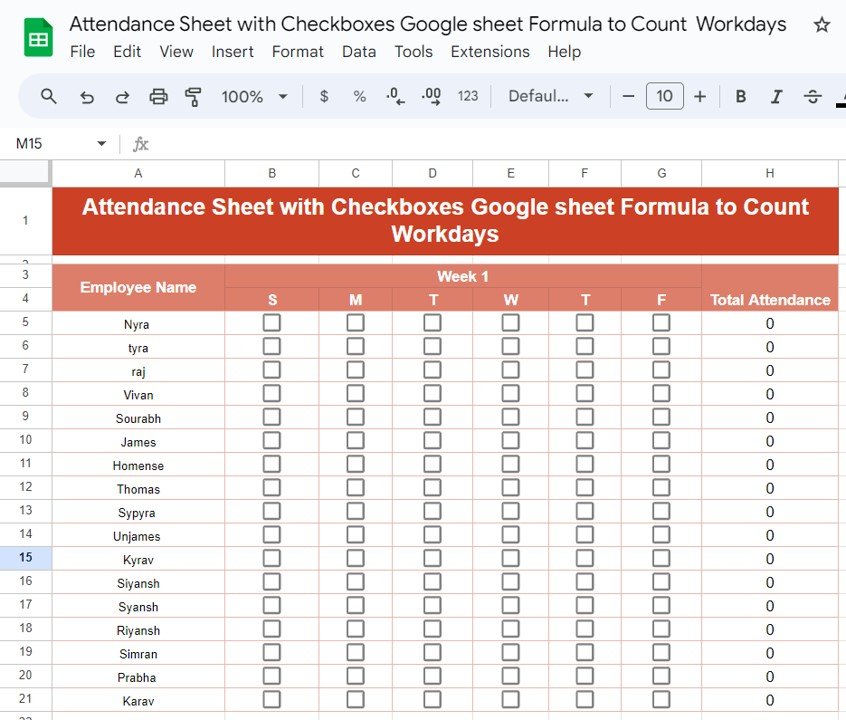
Example: Tracking Attendance for a Week
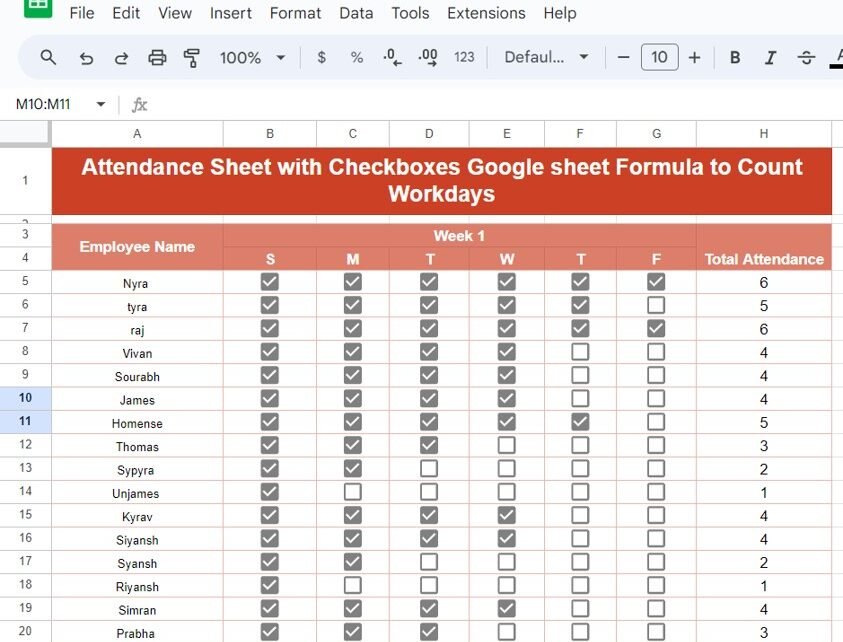
We have a simple table that records attendance for a group of employees over the course of one week. The data includes:
- Employee Name
- Days of the Week (S for Sunday, M for Monday, etc.)
- Total Attendance (calculated based on the checkboxes)
In this table, the checkboxes are either TRUE (checked) or FALSE (unchecked), and we will use a formula to count the number of checkboxes marked as TRUE for each employee.
Step 1: Inserting Checkboxes
To start, you need to insert checkboxes into your Google Sheet. Here’s how you can do it:
- Select the cells where you want the checkboxes to appear (in our case, B5
for the days of the week).
- Click on Insert in the top menu.
- Choose Checkbox from the dropdown.
Once the checkboxes are in place, you can manually check them for the days an employee is present.
Step 2: Using the COUNTIF Formula
Now that we have the checkboxes, we’ll use the COUNTIF function to calculate the total number of workdays attended by each employee. The formula we’ll use is:
=COUNTIF(B5:G5, TRUE)
Let’s break this formula down:
- B5refers to the range of cells containing checkboxes for each employee, spanning from Sunday to Friday.
- TRUE is the condition, meaning the formula counts how many checkboxes are checked (or marked as TRUE) in the range.
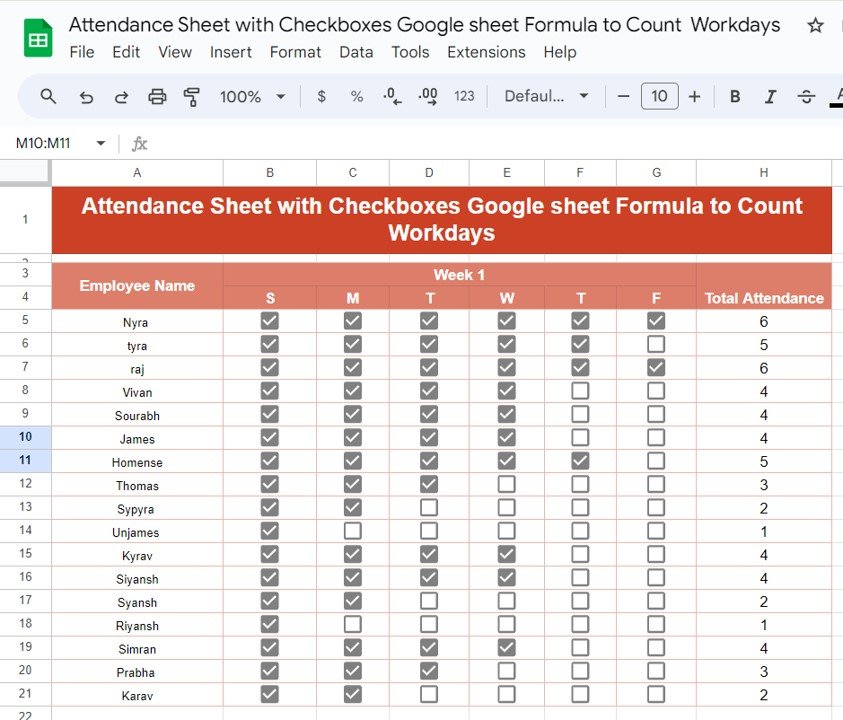
The result will be displayed in the Total Attendance column, giving you an accurate count of how many days the employee was present for that week.
Example Output
After applying the formula, here’s what the attendance data looks like:
As you can see, the Total Attendance column now automatically updates based on the checkboxes, saving you time and effort!
Why Use COUNTIF for Attendance?
The COUNTIF function is a great tool for attendance tracking because:
- ✅ Simple to Use: With just one formula, you can calculate attendance for multiple employees without complex setup.
- 🔄 Dynamic Updates: As you check or uncheck the boxes, the attendance count automatically updates, ensuring accuracy.
- 🚀 Efficient: This method can be scaled for larger teams, making it a quick solution for attendance tracking across departments or even entire organizations.
Conclusion
By using Checkboxes and the COUNTIF function in Google Sheets, you can streamline attendance tracking with just a few clicks. This setup is perfect for HR departments, team leads, or anyone looking to automate attendance management in a simple, user-friendly way.
Visit our YouTube channel to learn step-by-step video tutorials
Youtube.com/@NeotechNavigators
View this post on Instagram
