
Risk management is a vital component of any successful business strategy. Identifying, evaluating, and mitigating potential risks helps organizations protect their assets, maintain smooth operations, and safeguard their reputation. One of the most effective ways to manage risks is through a Risk Assessment Checklist. Using a digital tool like Google Sheets provides flexibility, easy access, and collaborative features that make risk assessment more efficient and effective.
In this article, we will explore the Risk Assessment Checklist in Google Sheets, its features, advantages, opportunities for improvement, and best practices to follow when using it. Whether you’re a business owner, project manager, or risk manager, this guide will help you understand how to effectively use Google Sheets to conduct risk assessments and improve your decision-making process.
Table of Contents
ToggleWhat is a Risk Assessment Checklist in Google Sheets?
A Risk Assessment Checklist is a systematic tool used to evaluate and document potential risks that could affect a project, business, or operation. By identifying these risks, organizations can determine how to prioritize and mitigate them.
A Risk Assessment Checklist in Google Sheets offers the advantage of being easily accessible, customizable, and shareable, making it an ideal choice for teams that need to collaborate in real time. Using Google Sheets for this purpose allows for centralized tracking, real-time updates, and simple data management, which makes the entire risk assessment process more streamlined and effective.
Key Features of the Risk Assessment Checklist in Google Sheets
This Risk Assessment Checklist Template in Google Sheets comes with two main worksheets that help you manage and assess risks with ease:
1. Risk Assessment Checklist Worksheet
The Risk Assessment Checklist is the main sheet in this template, where you will capture and track the details of each risk. It provides a structured format for entering risk-related data and managing the progress of risk mitigation efforts.
Top Section
In the top section of the Risk Assessment Checklist sheet, there are three cards that summarize key information:
- Total Count: This card displays the total number of checklist items that need to be assessed.
- Completed Count: This card shows the number of tasks or risks that have been completed or mitigated.
- Pending Count: This card indicates the number of risks or tasks that are still pending and need attention.
- Progress Bar: The progress bar visually represents the percentage of tasks completed, offering a quick overview of the risk assessment progress.


Click to buy Risk Assessment Checklist in Google Sheets
Checklist Table
The checklist table is where the bulk of the data is entered. You will update the status of each risk by marking it as ✔ (Completed) or ✘ (Pending). Here are the columns in this table:
- Serial No.: A unique identifier for each checklist item.
- Checklist Item: A brief description of the risk or task.
- Description: A detailed description of the risk or task, explaining its impact or importance.
- Responsible Person: The individual or team responsible for addressing the risk.
- Deadline: The target date by which the task or mitigation should be completed.
- Remarks: Additional notes or observations about the task, such as challenges or dependencies.
- Status: The current status of the task, indicated as either ✔ (completed) or ✘ (pending).
This layout ensures that you capture all essential details for each risk and can easily track their status.
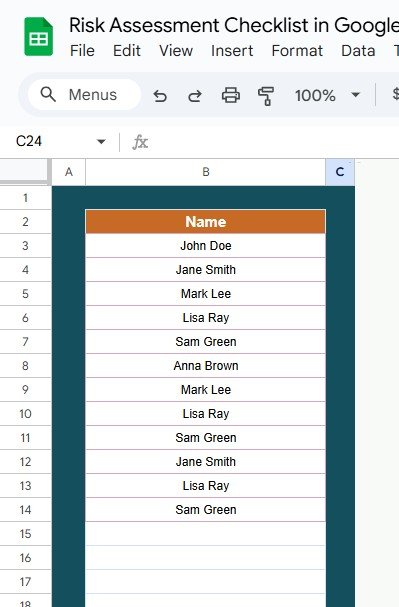
2. List Worksheet
The List Sheet is used to capture the unique list of Responsible Persons for your tasks. This sheet serves as the source for creating a dropdown list in the main checklist, making it easier to assign tasks to individuals. By having a predefined list of responsible persons, you can maintain consistency and avoid errors when assigning tasks.
This list can be easily updated and modified as needed, ensuring that your risk management process remains flexible and up-to-date.

Click to buy Risk Assessment Checklist in Google Sheets
Advantages of the Risk Assessment Checklist in Google Sheets
Using a Risk Assessment Checklist in Google Sheets offers several advantages for organizations. Here are some of the key benefits:
- Easy Accessibility and Collaboration: Google Sheets is cloud-based, which means your Risk Assessment Checklist is accessible from any device with an internet connection. This makes it easy for teams to collaborate and update the checklist in real time. Multiple team members can simultaneously work on the checklist, making it perfect for large teams or remote work environments.
- Customizable to Your Needs: One of the standout features of Google Sheets is its customizability. You can adjust the checklist template to fit the specific needs of your project or organization. Whether you need to add more columns, change the layout, or include additional data points, Google Sheets gives you the flexibility to tailor the checklist to your exact requirements.
- Centralized Data Tracking: With all the data stored in a single document, it’s easy to monitor the progress of risk mitigation efforts. You can quickly check the status of all tasks, see which risks are still pending, and review the progress made. This centralized approach helps teams stay organized and ensures that no risks are overlooked.
- Real-Time Updates: Google Sheets automatically saves changes in real time, ensuring that everyone on the team has access to the most up-to-date information. If a risk status is updated or a deadline is changed, the entire team will immediately see the change, which helps prevent miscommunication or errors.
- Data Visualization Tools: Google Sheets integrates with Google Data Studio and other visualization tools, allowing you to create charts, graphs, and dashboards based on your risk assessment data. This makes it easier to present risk-related information to stakeholders, helping them quickly grasp the situation and make informed decisions.
Opportunity for Improvement in the Risk Assessment Checklist
While the Risk Assessment Checklist in Google Sheets is a powerful tool, there are always opportunities to improve its functionality and performance. Here are some areas where improvements can be made:
- Integration with Other Tools: Integrating the Risk Assessment Checklist with other project management tools or data sources can improve its functionality. For example, connecting Google Sheets with project management software like Trello or Asana could automatically update the checklist based on the status of associated tasks or projects.
- Automating Risk Scoring: Incorporating automated risk scoring based on predefined parameters (such as the likelihood and impact of each risk) could enhance the checklist. By using formulas to automatically calculate risk scores, teams can prioritize tasks more effectively and focus on the highest-priority risks first.
- Advanced Reporting Features: While Google Sheets offers basic reporting features, incorporating more advanced reporting and data visualization options could improve the effectiveness of the checklist. This might include the ability to generate automatic progress reports or track risk mitigation trends over time.
Click to buy Risk Assessment Checklist in Google Sheets
Best Practices for Using the Risk Assessment Checklist in Google Sheets
To get the most out of your Risk Assessment Checklist in Google Sheets, follow these best practices:
- Update the Checklist Regularly: It’s important to keep the checklist updated regularly to ensure that the data remains relevant. Review and update the status of each risk, add new tasks as they arise, and ensure that deadlines are being met.
- Assign Responsibilities Clearly: Make sure that each task is assigned to a specific person or team. Use the Responsible Person column to ensure clarity and avoid confusion. Having a clear responsibility structure will help teams stay focused and accountable.
- Use the Dropdown List Effectively: Take full advantage of the Dropdown List in the List Sheet to assign tasks. This not only saves time but also reduces the chance of making errors when entering the names of responsible persons.
- Prioritize Risks Based on Severity: When filling out the checklist, consider adding a column to prioritize risks based on their potential impact and likelihood. This will allow you to address the most critical risks first and allocate resources effectively.
- Track Progress and Adjust as Needed: Monitor the progress of each task using the Progress Bar and Completed vs. Pending Counts. If you notice that certain risks are taking longer to address, adjust your strategy or allocate additional resources to mitigate those risks.
Conclusion
The Risk Assessment Checklist in Google Sheets is a simple yet powerful tool that helps businesses and project teams effectively manage and mitigate risks. By using this customizable template, teams can track potential risks, assign responsibilities, set deadlines, and monitor progress. Whether you’re a small business owner or part of a large enterprise, this checklist is an invaluable resource for keeping your risk management efforts organized and on track.
Click to buy Risk Assessment Checklist in Google Sheets
Frequently Asked Questions (FAQs)
What is a Risk Assessment Checklist in Google Sheets?
A Risk Assessment Checklist in Google Sheets is a digital template that helps businesses track, assess, and manage risks by providing a structured format for entering risk-related data, assigning responsibilities, and monitoring progress.
How can I use the Risk Assessment Checklist in Google Sheets?
Simply fill in the Checklist Item, Description, Responsible Person, and Deadline for each task. Use the Status column to mark each task as completed or pending, and track progress using the Progress Bar and summary cards.
Can I customize the Risk Assessment Checklist?
Yes, you can fully customize the checklist to fit your specific needs. Add or remove columns, change the layout, and adjust the formatting to match your project or organization’s requirements.
How do I assign tasks in the checklist?
Tasks are assigned by selecting a responsible person from the Dropdown List in the List Sheet. This list is automatically used in the Checklist Table to assign tasks efficiently.
How can I prioritize risks in the checklist?
To prioritize risks, consider adding a column to rate the severity and likelihood of each risk. You can then sort the checklist by these factors to focus on the most critical risks first.
Visit our YouTube channel to learn step-by-step video tutorials
Youtube.com/@NeotechNavigators
Click to buy Risk Assessment Checklist in Google Sheets
h3>Watch the step-by-step video Demo:
