Embed files into PowerPoint
In our digital age, presentations are the heartbeat of professional communication, education, and personal storytelling. Microsoft PowerPoint, a cornerstone of presentation software, offers a multitude of features to bring your ideas to life. In this article, we will explain how to embed files into PowerPoint. This nifty trick not only boosts the interactivity of your presentations but also ensures you have all your essential data in one neat package. Let’s dive into the surprisingly simple steps to embedding files into PowerPoint, making your presentations a crowd-pleaser.
First Off, Hit Up the Insert Tab
Alright, let’s kick things off by opening your Microsoft PowerPoint presentation. Head straight for the “Insert” tab at the top. This tab is like the Swiss Army knife of PowerPoint—it’s where all the good stuff begins.
Next Up, the Object Icon
Within the Insert tab, you’ll spot the “Object” icon. It’s your golden ticket. Clicking on this icon opens a new door, leading you to where you can choose the file you want to jazz up your slide with.

Object Window
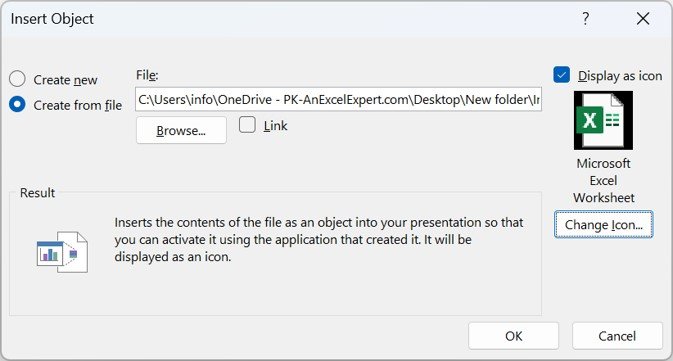
Clicking on the Object icon reveals the “Insert Object” window. Think of this as the control room for embedding your files. It’s where the action starts.
Choose “Create from File”
In this window, you’ll see a bunch of options. Go ahead and select “Create from file.” This option is your friend, letting you pick a file from your computer to embed into your slide.
Browse and Pick Your File
After selecting “Create from file,” it’s time to hit the “Browse” button. This opens up your file explorer, allowing you to navigate to and select the perfect file for your presentation.

Customize the Look of Your Embedded File
Want to make your slide look even sharper? Click on “Change Icon” to personalize the appearance of your embedded file. This step is optional but can add a professional touch to your presentation.
Select an Icon That Speaks Volumes
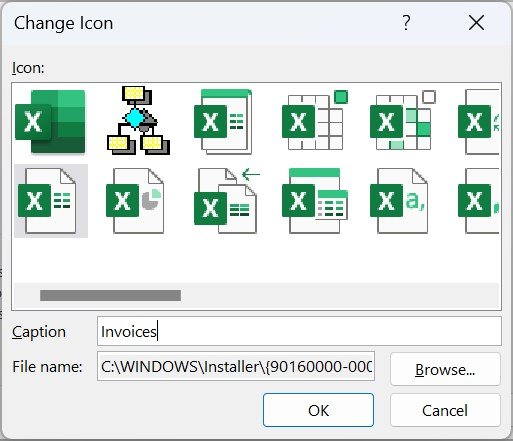
Upon hitting “Change Icon,” a window pops up where you can choose an icon that best represents your file. This is your chance to add a visual element that makes your slide more intuitive and engaging.
Give It a Caption
Still in the Change Icon window, don’t miss the chance to change the caption of your embedded file. A descriptive name or instruction can significantly enhance your audience’s understanding.

Wrap It Up with an OK
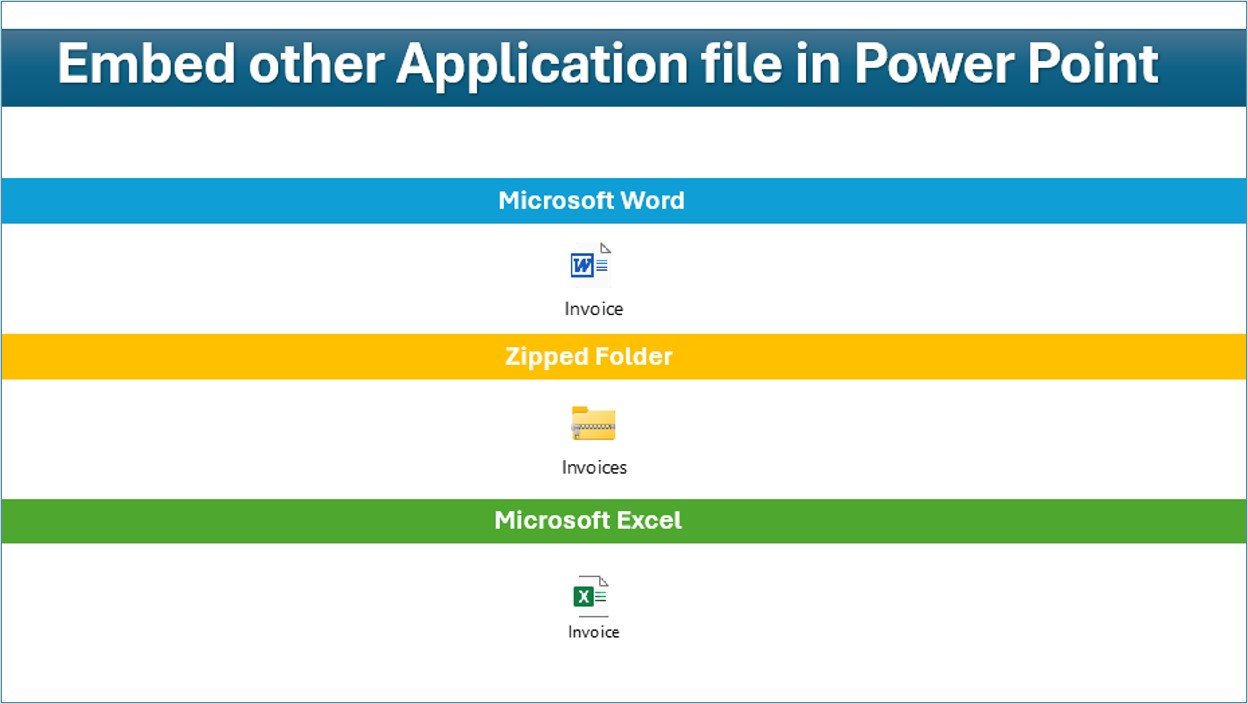
Once you’re happy with the icon and caption, hitting “OK” seals the deal. Your chosen file is now snugly embedded in your PowerPoint slide, accessible with a simple double click.
Making Your Presentations Unforgettable
Embedding files from other applications into your PowerPoint slides is a total game-changer. It not only enriches your presentations with valuable information and interactivity but also keeps your audience glued by providing a seamless experience. Whether it’s a document, a spreadsheet, or any other type of file, having it embedded directly in your presentation means your audience has immediate access to all the info they need.
By following these straightforward steps, you can take your presentations from good to great, making them more dynamic and insightful. So next time you’re gearing up for a PowerPoint presentation, remember to tap into the power of embedding. Your audience will thank you for it! Happy presenting!
Visit our YouTube channel to learn step-by-step video tutorials
Youtube.com/@NeotechNavigators


